Friday 17 February 2012

The Making of a Spectrum Loading Screen - Part.2

In the second part of this article I`ll go through the process of converting the final loading screen bitmap to a ZXSpectrum loading screen.
The method we use is detailled below as a set of key stages.


Stage.1 - ZXPaint
The first stage is to convert the .BMP image to a .SCR file.
To do this download and launch BMP2SCR.exe - you can grab it here ftp://ftp.worldofspectrum.org/pub/sinclair/tools/pc/BMP2SCR1751.zip
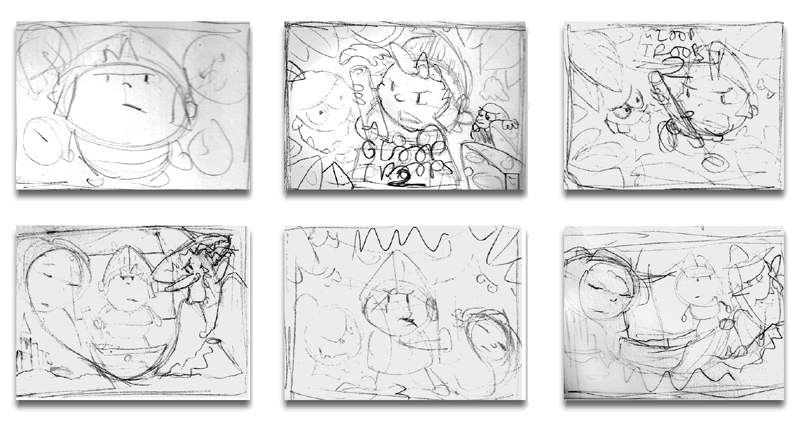
Follow the steps displayed in the image below. Anything green is a button you need to click.
The final step in the image has two options in green. You need to click on 'B=Toggle Bright' first.
In the third step, locate and select your final colour loading screen BMP image.


You'll now have a SCR file in the same folder, with the same name, as your original BMP image.


Stage.2 - ZX-PaintBrush
To start download, install & launch ZX-PaintBrush. You can grab it here http://www.zxmodules.de/zxpaintbrush/zxpaintbrush.html

Within ZX-PaintBrush 'Open' the .SCR loading screen file.
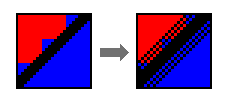
All looks good with your image? Switch off the colours (i.e paper colour=black & pen colour=white) and your image now appears scrambled!
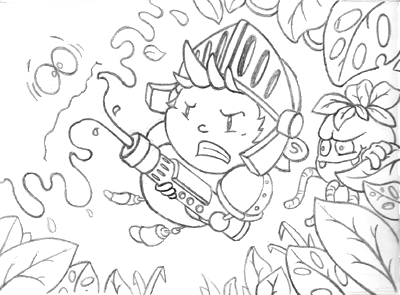
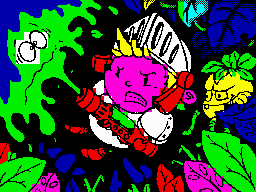
As an example the below image shows the Gloop Troops 2 loading screen, imported from a BMP file, with the colours switched off.

So what's going on here? Simply the conversion process chose one of the two colours, in each tile, to be the paper colour (bits set to 0).
This meant that some tiles paper and pen colours were switched i.e. we have inverted tiles.
Because the colours are also switched the colour image appears fine. Remove the colours and the inverted tiles are revealled.
Thankfully ZX-PaintBrush has a toolset that allows for tiles to be re-inverted.
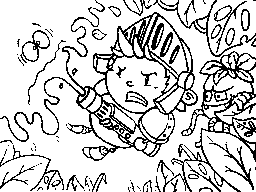
First thing to do is switch off the colour display.
Now select the 'invisible pixel and attribute inverter'pencil from the toolbar and click on any inverted tiles to revert them.
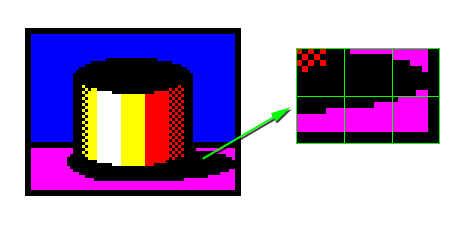
Below is screen shot of the ZX-PaintBrush UI with the colour display(1) and 'invisible pixel/attribute' pencil(2) buttons hi-lighted in green.

Once you've reverted all the inverted tiles you may now wish to add back in the half-bright colours on some of your tiles.
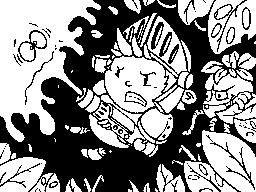
To do this I find the best thing to do in ZX-PaintBrush is to switch off the ink&paper colours as well as the pencil tool.
If you now select the half-bright option (dark semi-circle icon) you can click on any tiles you wish to set as half-bright colours.
Below is a screenshot of ZX-PaintBrush's UI. The areas of the UI that aren't darkened show the pencil tool, colour palette & half-bright attribute buttons.


When everything is complete, 'Save' it over the original .SCR file.


Stage.3 - Converting to a TAP file
We're now going to step through the stages that takes your game .TAP & loading screen .SCR file and combines them into a single .TAP file.

First thing to do is create a folder called 'MyGame''
This stage requires the pasmo z80 compiler. You can grab it from here http://pasmo.speccy.org/
Once downloaded, extract the contents to the 'MyGame' folder.

Now download BASTOTAP and extract the contents of the zip to the 'MyGame' folder. You can grab it here ftp://ftp.worldofspectrum.org/pub/sinclair/tools/pc/bas2tap25-win.zip

Now in your MyGame folder, create a file called Loader.bas and paste in the following lines of basic code;
10 PAPER 7 : INK 0 : PRINT AT 0,0
20 LOAD "" SCREEN$


Now create a file called LoadingScreen.asm and paste in the following lines of code;
org 0
incbin "LoadingScreen.SCR"


LoadingScreen.asm is the assembly file which will include the loading screen you've created.

Copy your loading screen to the 'MyGame' folder and rename it to 'Loading_Screen.SCR'.

Now open a command window and go to the MyGame folder. Type the following commands to build your game .TAP file.

bas2tap.exe -a10 -sLOAD loader.bas LOADER.TAP

pasmo --tap --name SCREEN LoadingScreen.asm LOADING_SCREEN.TAP LS.TXT

COPY /B /Y LOADER.TAP+LOADING_SCREEN.TAP FINAL.TAP


The first line calls bas2tap to convert your basic program to a .TAP file.

The second line calls pasmo to assemble your LoadingScreen.asm file ( which includes your loading screen image ) into a .TAP file.

The final line copies the basic loader and the loading screen .TAP files into your FINAL.TAP file which you can run in a spectrum emulator!

Drop this into a spectrum emulator and, hopefully, your game will now contain your loading screen!

This should now give you a good template in which to use when you wish to add a loading screen to your game.

Andy Oakley

Sunday 5 February 2012

The Making of a Spectrum Loading Screen - Part.1

Over the last couple of years I`ve worked on several Spectrum loading screens and I`ve wanted to share with you the techniques I`ve learnt along the way.
To do this I`ve broken it down into six key stages which I`ll go into now.

Stage.1 - Rough sketches

Before venturing onto the computer a series of rough sketches are produced.
At this stage I find drawing on paper is much quicker and fluid than drawing on the computer.
Below are a few rough sketches drawn for the Gloop Troops 2 loading screen.
Anything went at this stage. Putting any ideas down on paper, good or bad, seemed to spark new ideas so I kept drawing until I hit upon an image I was happy with.


Stage.2 - Finalised sketch

Once a sketch has been decided upon the next stage is to produce a detailled version of it.
The colour restrictions of the Spectrum make it hard to finally colour small details so try and keep the shapes and forms on your drawing as large as possible.
As a guide, a good tip is to print out a grid that contains the screen tile grid size.
Tracing paper, which the final image will be drawn on, can now be sat on top of this grid and act as a useful guide.

The final drawing is then scanned into the computer.


Stage.3 - The Black and White image

The scanned image now needs to be converted into a black and white image.
To do this we first reduce the scale of your image to the correct Spectrum screen resolution which is 256 X 192 pixels.
The image is now converted to black and white. In Photoshop,or one of the many free alternatives, the brightness and contrast settings dialog is opened.
The contrast setting is put to the maximum value. This will convert all the pixels to either black or white and remove any gray shades.
Sliding the brightness bar now changes the line thicknesses. The bar is slid until a desired line thickness is reached.
Below is the converted sketch produced for Gloop Troops 2.


Stage.4 - Background colour

Next stage is to fill any background areas with black.
I personally tend to use black over any other colour as it is easier to avoid any later colour clash.


Stage.5 - Colour blocking

The black and white image is now filled with colour.
We're not concerned about any colour clashing at this stage. Adding the colour is a good way of figuring out the overall look of the final loading screen. Removing any colour clashing can be done during the next astage.


Stage.6 - The Final Stage

This stage is the longest. Expect to spend a good few hours from here on bringing your loading screen up to the final version.
I personally find this stage the most enjoyable. Seeing the rough sketch slowly transform into a final realised loading screen is very rewarding.

For the remainder of this stage I will run through a few techniques, that I use.

Black dithering
I usually have the paper colour black for most of the tiles on my loading screens. This may sound limiting but it is surprisingly versatile when it comes to smoothing over ugly colour clashing.
The below image demonstrates this in action. The one on the left shows a typical situation where we have two shapes that have a nasty case of unavoidable colour clashing. We can't fix this but we can hide it!
The image on the right demonstrates using black dithering to hide the colour clash.


Thick Lines
Another technique is to make the outlines around the shapes quite thick.
The thicker lines allow the black paper colour to form a boundary between two different colours.
The below image demonstrates this in action.


Shadows
An alternative to the thick outlines are shadows.
Shadows are great as they can be the same colour as the background and act as a good 'buffer' between the different features of your loading screen.
If you're after a loading screen with a background colour other than black then this is a good technique to use.
The below image demonstrates this.


Shuffling things around!
Sometimes there are occasions where no techniques seem to hide colour clashing.
In these cases the only real option is to redesign this area.
Most of the time it'll just be a matter of moving a piece of the image around until it better fits the grid.
The key here is to not take your original drawing too literally and be prepared to redesign areas to work better with the Spectrums limitations.


Closely matching colours
When applying colour to smaller details on your image try and paint them with colours that don't clash badly. As an example, yellow and cyan work well with white.
This shouldn't dictate the palette you wish to use on your image but it might be something you wish to use in certain cases.

Grid display
When rendering the final stage it helps to have a grid (set to 8X8 pixels) over your image to act as a guid. It's a very useful tool when checking for any tile blocks that may contain more than two colours.


Conclusion
Below is an animation showing different stages of the Gloop Troops 2 loading screen from the initial sketch through to the final image.


Hopefully there are some useful tips that you can take from this post.
In my next post I`ll go into greater detail the initial design stage of a cutscreen.

Finally, as a bit of inspiration, here is a link to a collection of fantastic Spectrum images http://zxspectrum48.i-demo.pl/zxgallery.html

Andy Oakley

Thursday 2 February 2012

Slight update to Gloop Troops and Gloop Troops: The Lost Crown

A slightly tweaked version of Gloop Troops and Gloop Troops: The Lost Crown is now uploaded to World of Spectrum! This contains a new QAOP and SPACE keyboard control option to make playing the game on real hardware a bit easier :-)